Create an SST app
Now that we have some background on SST and infrastructure as code, we are ready to create our first SST app!
We are going to use a template SST project, it comes with a good monorepo setup. It’ll help us organize our frontend and APIs.
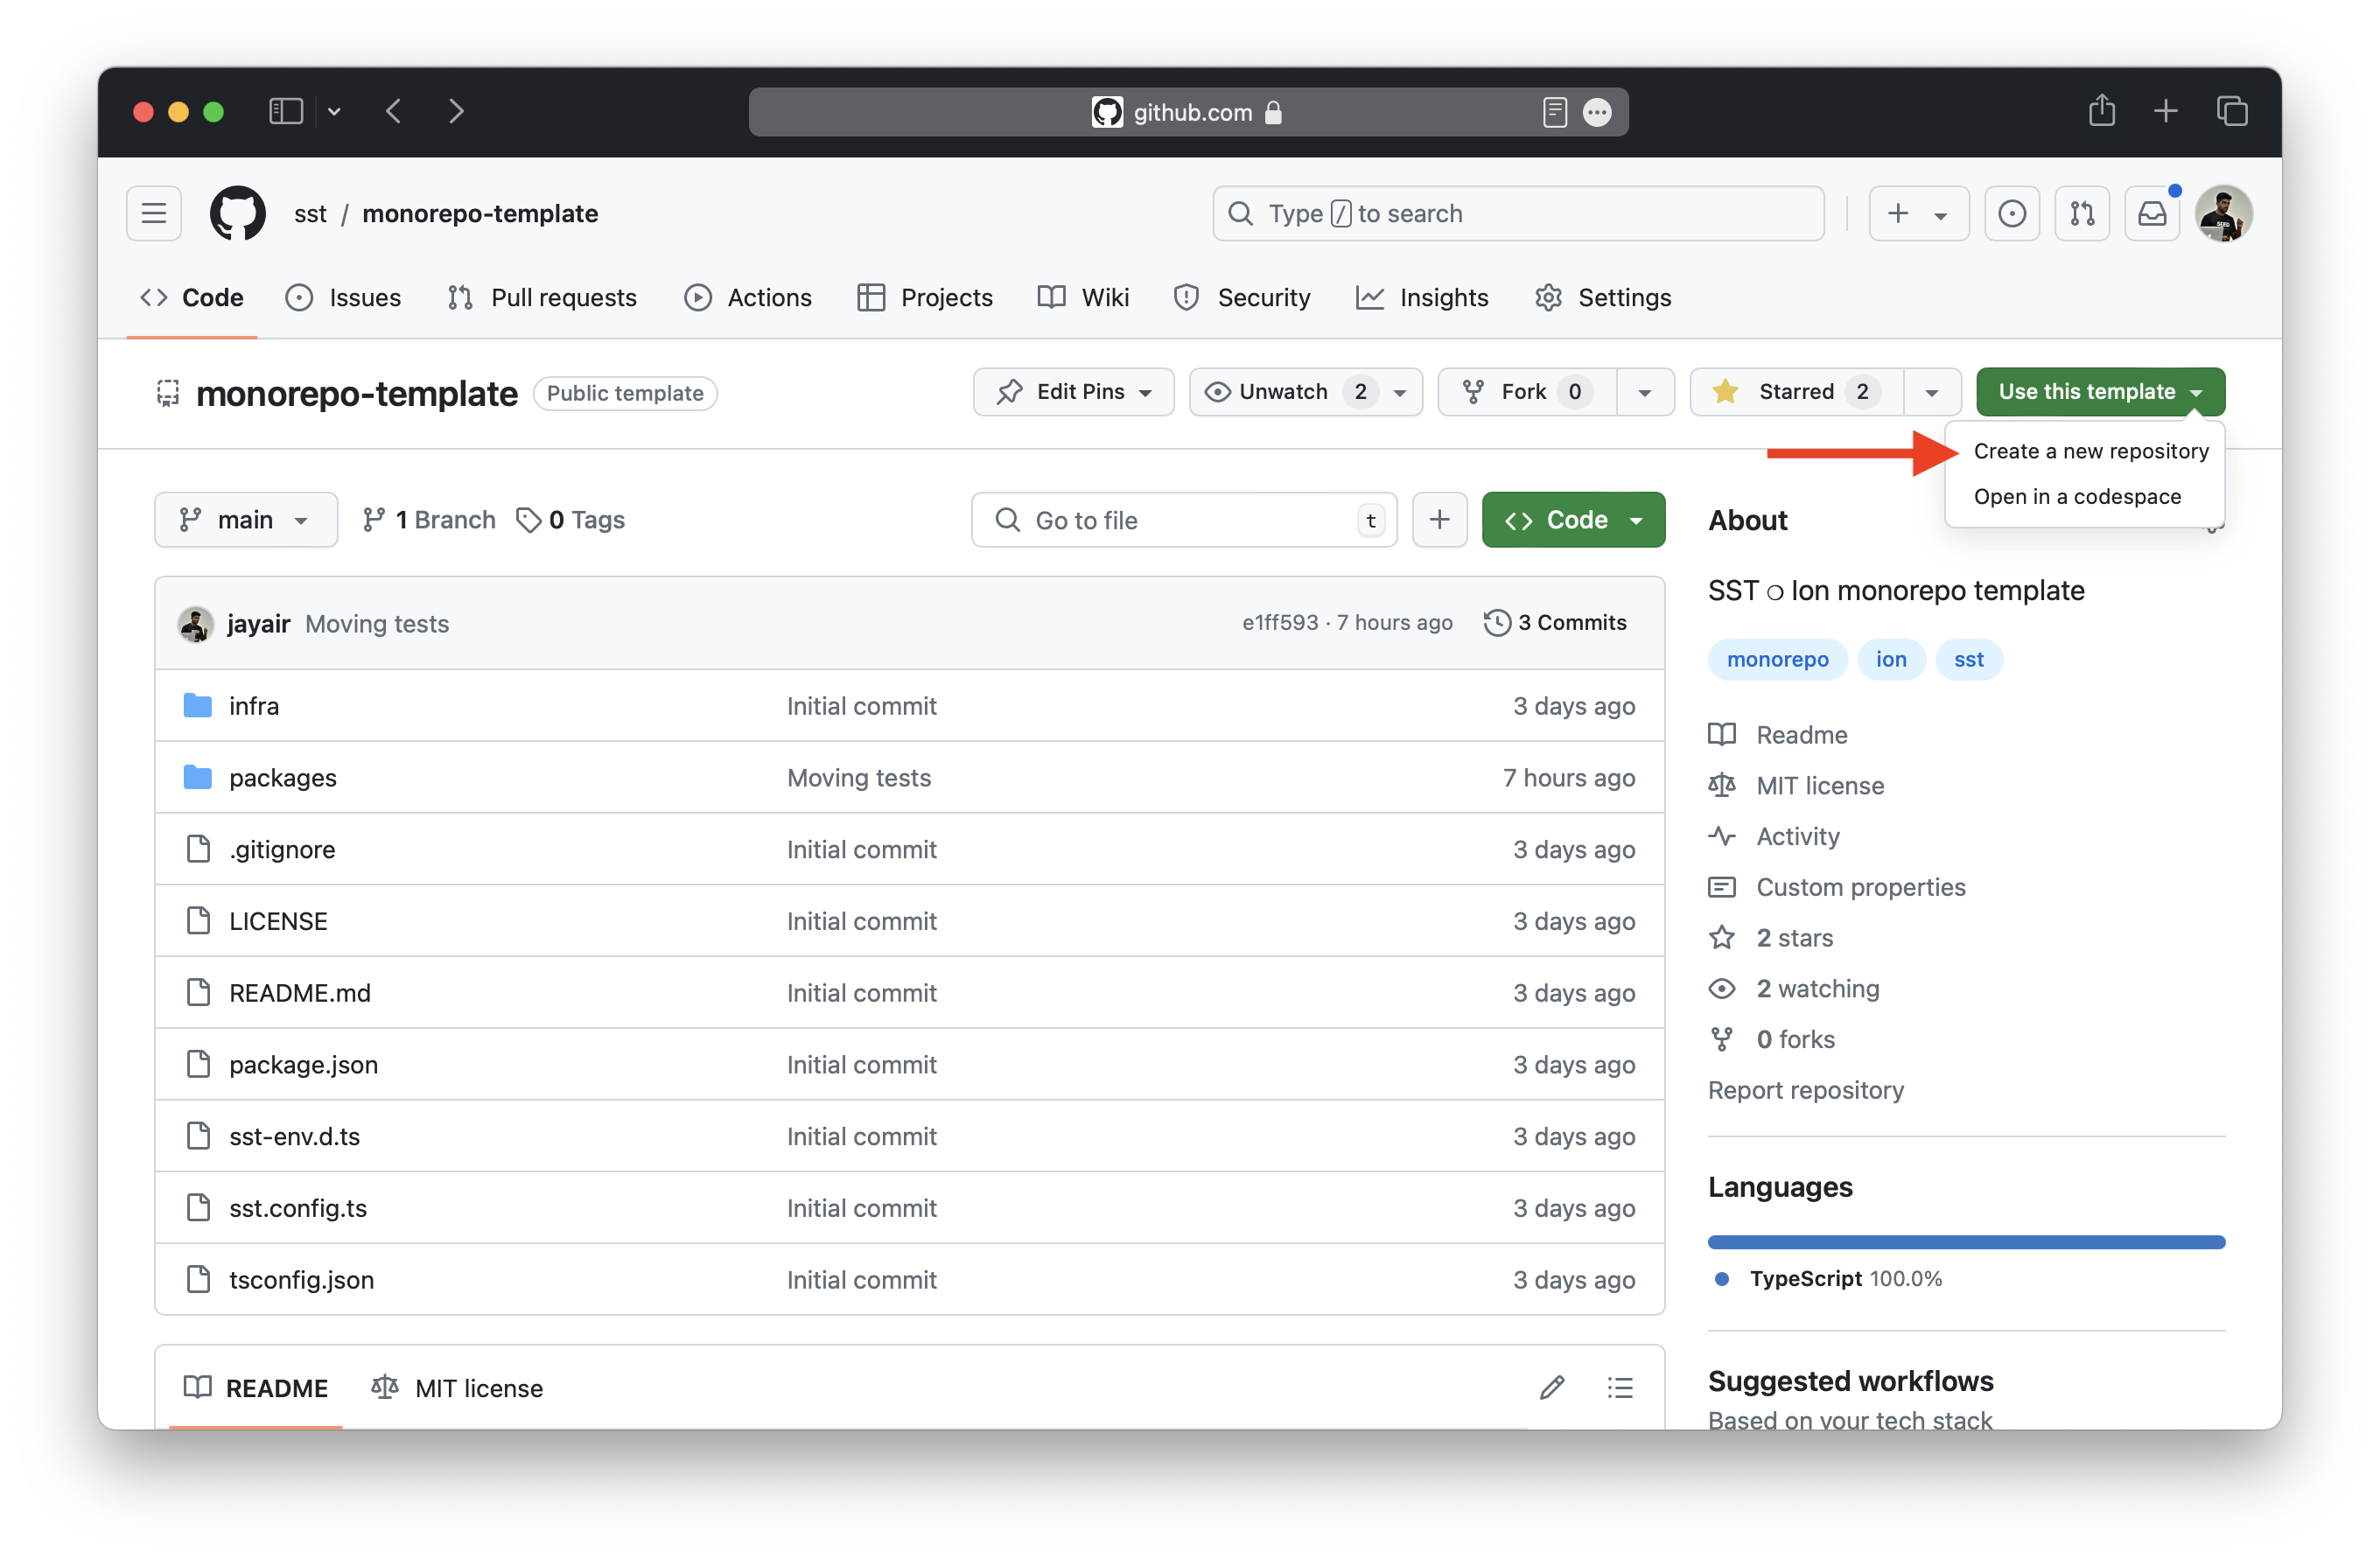
Head over to — github.com/sst/monorepo-template, click Use this template > Create a new repository.

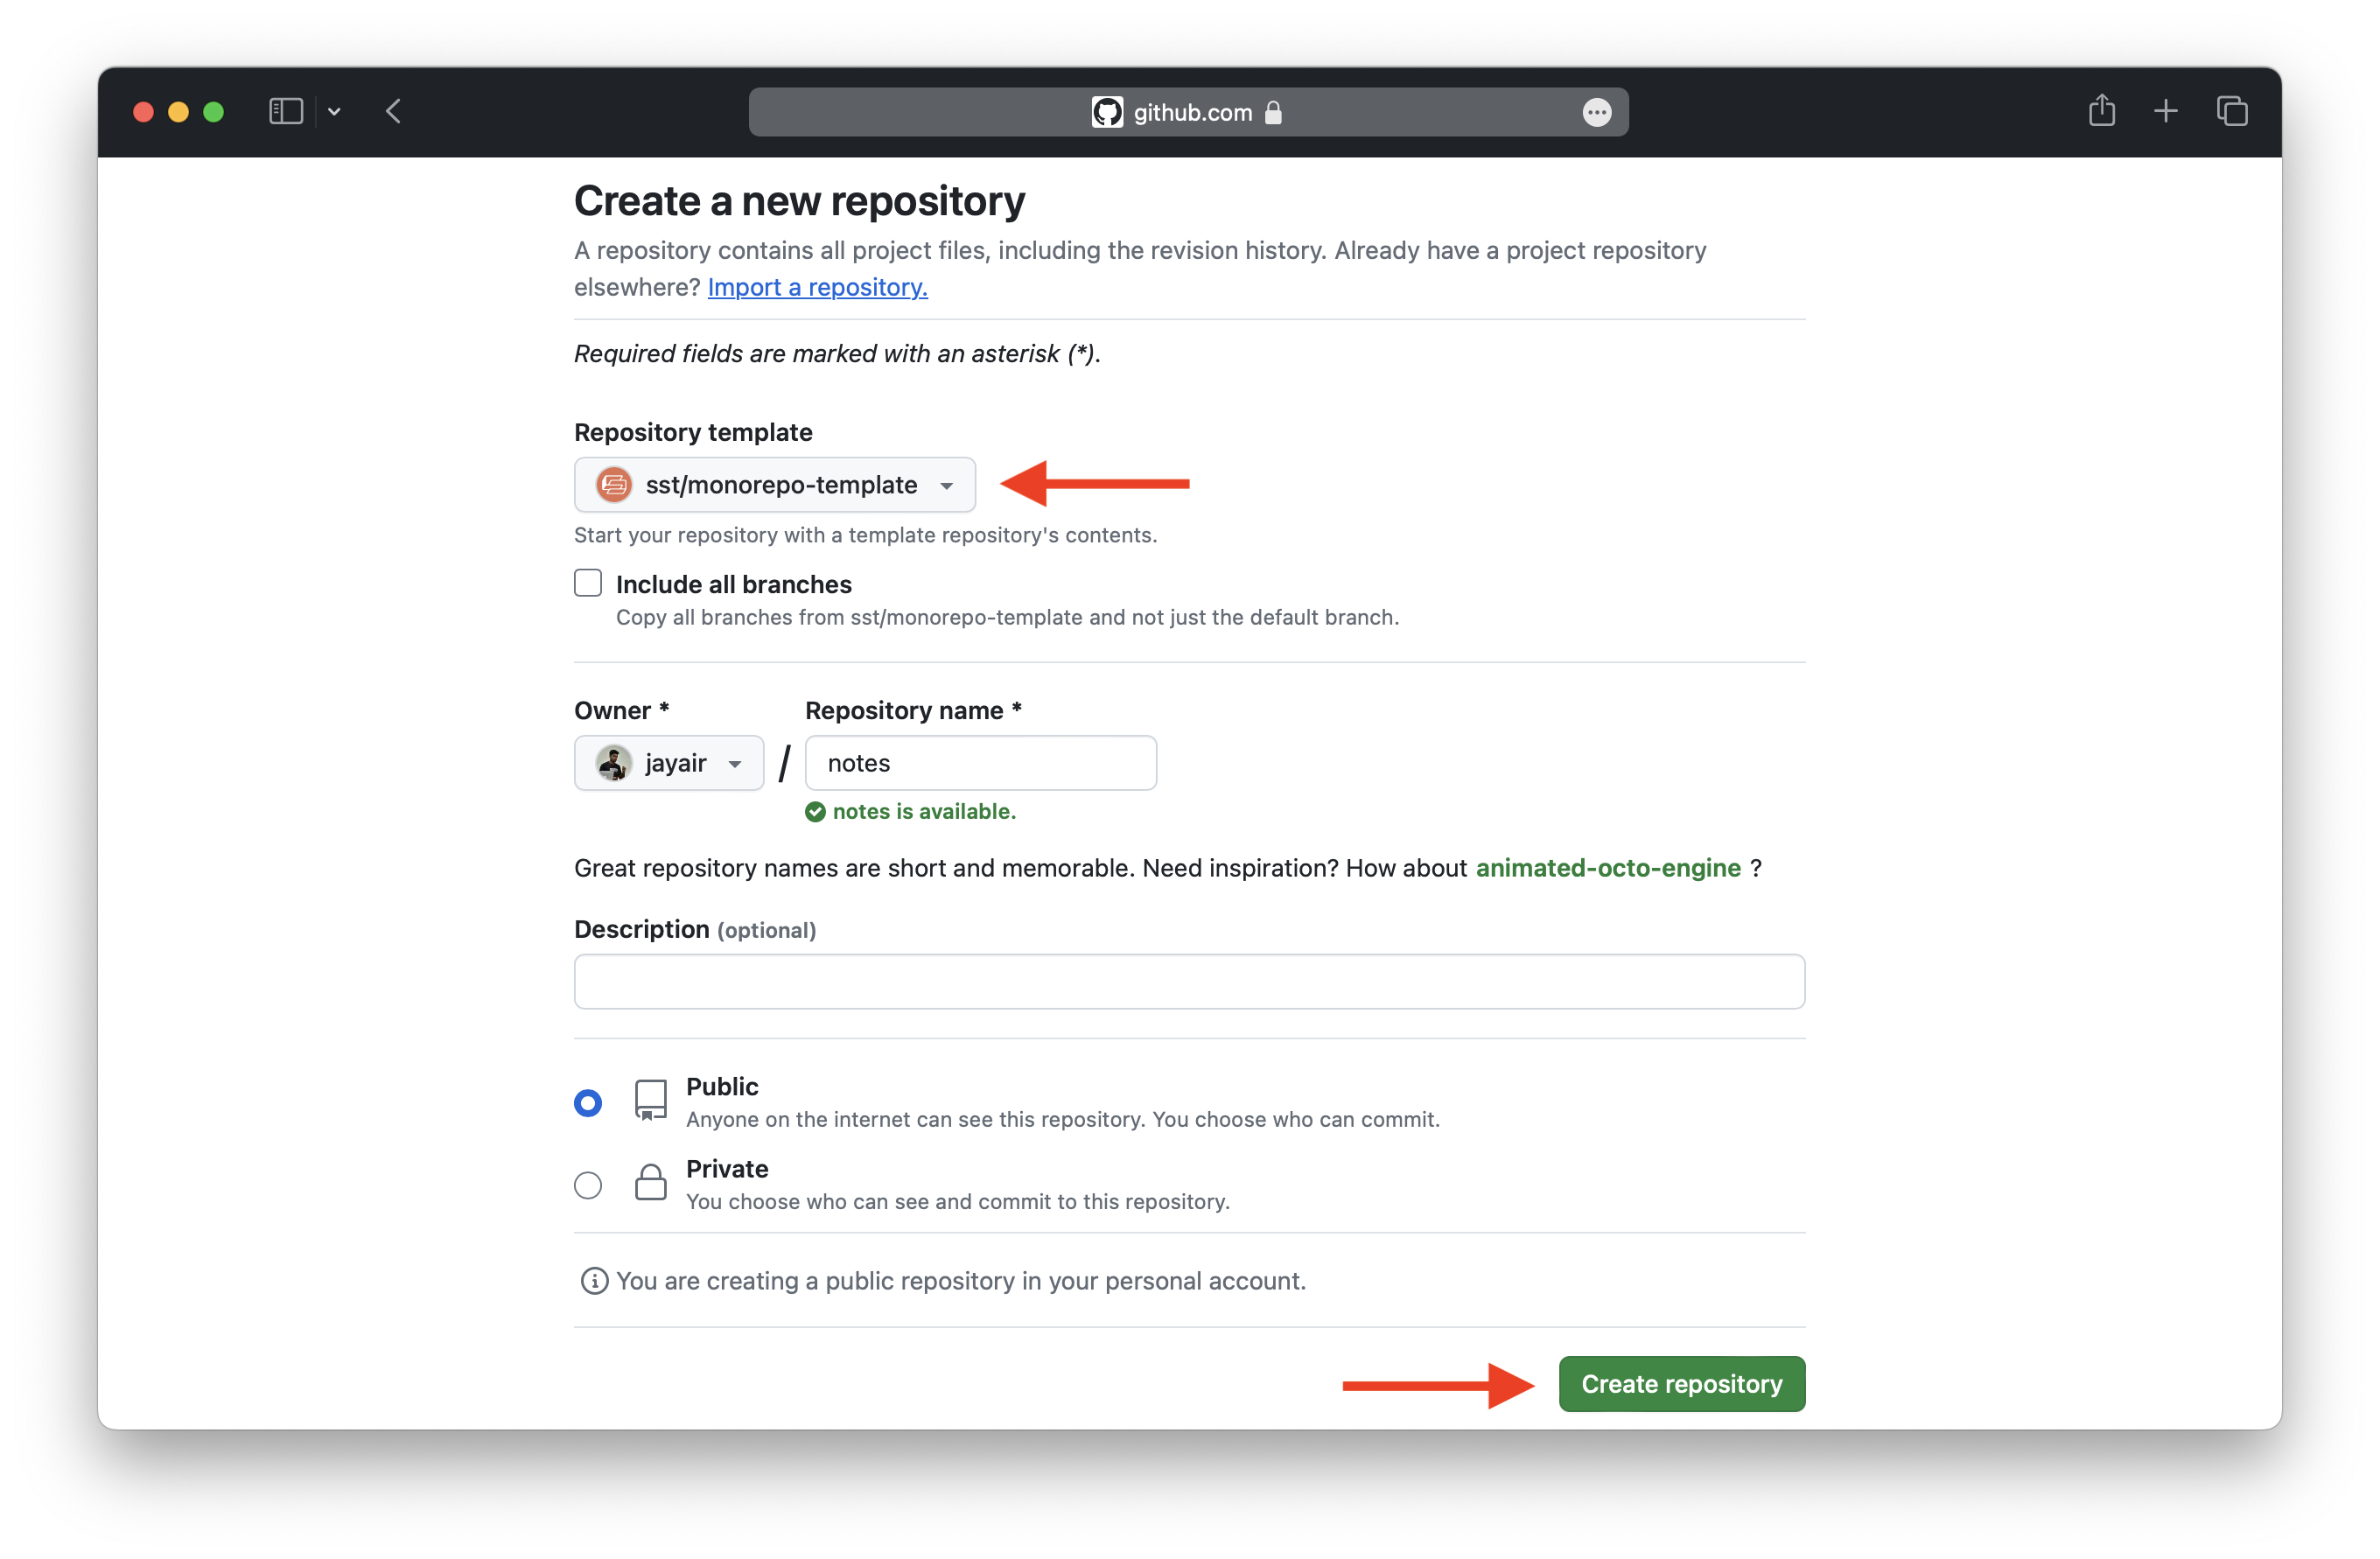
Give your repository a name, in our case we are calling it notes. Next hit Create repository.

Once your repository is created, copy the repository URL.
 Run the following in your working directory.
$ git clone <REPO_URL>
$ cd notes
 Use your app name in the template.
$ npx replace-in-file /monorepo-template/g notes **/*.* --verbose
 Install the dependencies.
$ npm install
By default, the template is creating an API. You can see this in the sst.config.ts in the root.
/// <reference path="./.sst/platform/config.d.ts" />

export default $config({
  app(input) {
    return {
      name: "notes",
      removal: input?.stage === "production" ? "retain" : "remove",
      home: "aws",
    };
  },
  async run() {
    await import("./infra/storage");
    const api = await import("./infra/api");

    return {
      api: api.myApi.url,
    };
  },
});
The name of your app as you might recall is notes. A word of caution on IaC, if you rename your app after you deploy it, it doesn’t rename the previously created resources in your app. You’ll need to remove your old app and redeploy it again with the new name. To get a better sense of this, you can read more about the SST workflow.
Project layout
An SST app is made up of two parts.
-
infra/— App InfrastructureThe code that describes the infrastructure of your serverless app is placed in the
infra/directory of your project. -
packages/— App CodeThe Lambda function code that’s run when your API is invoked is placed in the
packages/functionsdirectory of your project, thepackages/corecontains our business logic, and thepackages/scriptsare for any one-off scripts we might create.
Later on we’ll be adding a packages/frontend/ directory for our React app.
The starter project that’s created is defining a simple Hello World API. In the next chapter, we’ll be deploying it and running it locally.
For help and discussion
Comments on this chapter